2 Cute Ink Digital Stamps Blog
Daily Inspirations!
Sunday, February 17, 2013
Guest Designer Sunday!
I am excited to finally start having guest designers on Sunday! Our first guest designer is Melissa Chipperfield! She used the "Squirrel Present" 2 Cute Ink digital stamp. I love her pink and grey combination and the cute sparkle heart embellishments! Remember if you would like to be a guest designer for 2 Cute Ink Digital Stamps please email me at 2cuteink@gmail.com.
Friday, February 15, 2013
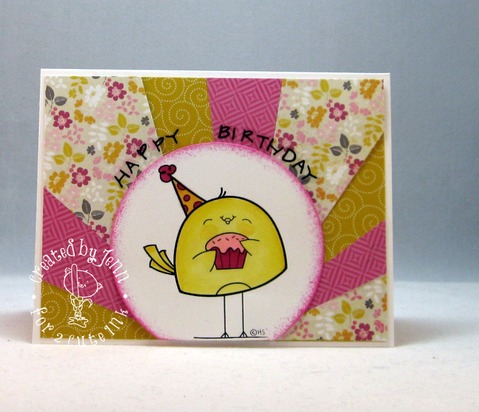
New Digital Stamp "Cupcake Birdie"
Sandy
Judy
Chris
Jan
Nicole
Jenn
Thursday, February 14, 2013
Throwback Thursday "Shamrock Turtle" Digital Stamp
So I am excited to be re-releasing Shamrock Turtle digital stamp and it is a perfect time since St. Patrick's day is around the corner! I believe that I have about 5% Irish in me but I am also Danish, Swedish, Polish and German! I am ready to create some new good luck and St. Paddy's day designs starting next week! But in the mean time check out this cute card below made by Mary!
Shamrock Turtle Digital Stamp in now available in the 2 Cute Ink Digital Stamp Shop!
Tuesday, February 12, 2013
Tutorial Tuesday - Digital Paper Piecing
Welcome to another Tutorial Tuesday here at 2 Cute Ink! Today I have a little tutorial showing you how to paper piece digitally. Paper piecing is traditionally where you would stamp an image onto a few different pieces of paper and then layer them all together. It is a great way of 'colouring' and image using patterned paper.
To digitally paper piece is a little bit trickier but just as easy, once you have patience with a scissors! I used the adorable Puppy Love image for this tutorial.
Step 1
Print the digital image out to the size you want on a sheet of normal printer paper.
Step 2
Pick your first colour piece of paper you want to print onto. Using sellotape tape this down onto the printer paper. Make sure the tape is stuck down firmly with no bits sticking up, other wise it may get stuck in your printer!
Step 3
Print the image again.
To digitally paper piece is a little bit trickier but just as easy, once you have patience with a scissors! I used the adorable Puppy Love image for this tutorial.
Step 1
Print the digital image out to the size you want on a sheet of normal printer paper.
Pick your first colour piece of paper you want to print onto. Using sellotape tape this down onto the printer paper. Make sure the tape is stuck down firmly with no bits sticking up, other wise it may get stuck in your printer!
Step 3
Print the image again.
Step 4
For the colours you want to print on next repeat the process. Just make sure to line up your coloured papers with the correct part of the image on the printer paper.You can see below I added a small strip of blue paper so that I could get the bandanna blue.
And when it is printed....
Continue this way until you have all your colours done.
Step 5
To do the paper piecing you need a base image. I used the large brown card for my base image. To paper piece cut out the element you want. For the one below I carefully cut out the blue bandanna and then adhered it to the base image.
When cutting out the elements you need to cut just inside the printed line so that it fits perfectly into the base image. Continue to cut out all your elements. A tweezers to hold the tiny elements helps a lot, as does steady hands and a very sharp scissors!
You can see my completed image below. I kept my puppy on the brown base so that his face, bandanna and flower would all stand out on the image.
And here is my completed card....
I hope you liked this tutorial,
Happy Crafting!
Nicole
Friday, February 8, 2013
New 2 Cute Ink Digital Stamp "Puppy Love"
Chris
It is Friday and that means I have a new 2 Cute Ink digital stamp to release! Today's new digital stamp is called "Puppy Love. It is of a cute little pup who has a rose in his mouth along with a tiny mouse on top of his head! I think this is one of my favorite designs I have created so far! To get you inspired the 2 Cute Ink DT has created some wonderful cards above and below! "Puppy Love" is now for sale in the 2 Cute Ink Digi Shop!
![]() |
| "Puppy Love" Digital Stamp |
Sandy
Jenn
Judy
Jan
Margaret
Nicole
Thursday, February 7, 2013
Throwback Thursday Hula Hoop Hamster
So I am excited to share this oldie but goodie digital stamp "Hula Hoop Hamster"! He is one of my favorites and so many loved this little guy so now he is back! Hula Hoop Hamster is now available in my 2 Cute Ink Digi Shop!
Tuesday, February 5, 2013
Tutorial Tuesday - Step By Step Card
Card
Tutorial
This is a step by step tutorial on how to
create a fun card using the adorable 2 Cute Ink Birthday Hippo image.
What you will need:
- Birthday Hippo image
- Papers – I used Doodlebug designs Boys Only 6x6 papers
- Card blank or cardstock for card base
- Adhesives
- Dies – I used the Deckled Rectangles and the Nested Circles from Spellbinders
Step
1
Print the digi image and let the ink dry
fully. I die cut the image out of my page using the second largest circle die.
Step 2
Die cut two deckled rectangles from your
paper. I used the largest deckled rectangle on my first piece. This piece of
paper was 13.5cm high and 6cm wide. It worked out slightly too short for the
top and bottom of the die to cut the edges which was perfect as I wanted them
straight on the top. You could always trim them straight after die cutting if
you needed to though.
I used the next size down deckled rectangle
die for my second piece of patterned paper.
Step 3
I cut a piece of the patterned paper to 13cm x 13cm to mat
onto my 13.5cm x 13.5cm card base..
Step
4
I wanted to create a scalloped effect on
one side of my orange patterned paper. To do this I used a 1inch circle punch
to cut out lots of circles. I then used red line tape to stick this onto the
back of the orange paper.
Step 5
I die cut a larger circle than my image
from green patterned paper and mounted my image onto this with foam pads for
dimension.
Step 6
To add some interest to my grey patterned paper I doodled
around the edges with a looping pattern.
Step
7
I glued down my two deckled rectangles. The
orange piece goes right to the top and bottom of the white card base. The
smaller piece slots in behind it.
Step
8
For my sentiment I cut a banner shape from
the grey card and stamped my sentiment on it. I also added some faux stitching
with a black pen.
Step
9
I glued my circle with my image straight
onto the card.
Step
10
I glued my sentiment banner directly down
also. I added more to the faux stitching to make it look like it was stitched
onto the card base. I added some gems in colours to match the papers for more
interest on the sentiment.
Once all these elements are glued on you
are done. Enjoy the card!!
Subscribe to:
Posts (Atom)